Here are some tips on installing TractorFabs new John Deere weights. We had originally planned on offering replacement cast front weight brackets, but after doing several installations, it was decided that this wasn't necessary.

Step 1.: Remove the front cast on weights, being carefull to leave the weight bracket. We used a razor saw, and cut the front of the weights off first, cutting right at the front of the cast on bracket line. Then we cut the tops of the remaining weights off, followed by the bottom, being careful to make the remaining piece the correct thickness for the new TractorFab weights.

Step 2.: Test fit a single weight to the cast on bracket, making sure you can slide a weight all the way across without interference.

Step 3.: Glue the weight stack together carefully. In this picture we used two kits. We found that it is easier to glue two complete kits back to back prior to cutting off of the tree. This greatly helps with alignment of the weights to each other. Test fit the complete stack to the tractor.

Step 4.: Paint the weights, and install. Touch up the paint on the tractor as well.
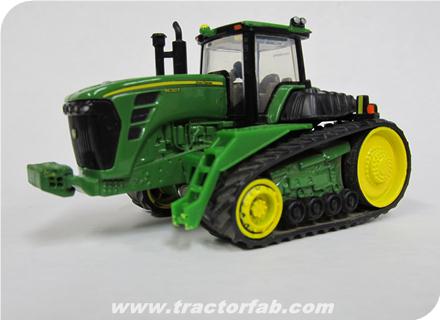
The conversion is complete!

Use the same process for older style weights as well. Remove the tires while cutting, and apply tape to the front of the hood to prevent any accidental cuts or scratches to the paint.
A great way to share your finished models is with photos. While you can always snap a quick one with your smart phone, taking quality photos isn't hard. Here are some tips that we at TractorFab follow:
The single most important component to a quality photo is the lighting. The best light source for a realistic photo is the sun. All of our photos on TractorFab.com are taken outside in the sunshine. Good quality ighting will make even a low qualtiy model look better. The lighting angle is important too. Make sure the sun is behind you, not in front of you. Otherwise you'll end up with shadows.

This picture was taken in the late afternoon fall sunshine, giving the picture an overall warm tone.
To improve your realism, look at what is going to be behind your model in the picture. Try for something natural, such as trees of fields. Buildings that are in the distance work great too, as they can blend in better. Even if you live in an urban setting, you'll be able to find something, like a pine tree or some bushes for your back drop, rather than a car, or your front door.

The picture above ended up having the electric meter in the background, not noticed until after the picture was viewed on a larger screen. After cropping (below), it was still turned out OK.


While the lighting in this picture is acceptable, the rear car hatch in the background is not.
This is kind of a scary word, but a simple photo board will greatly improve your photo realism level. Even a board with sifted dirt will do fine. Almost all of our pictures are taken on a small 10" x 16" diarama we built just for that purpose. Get creative as time permits - add fences, gravel, dirt, grass, trees, etc.

Above is TractorFab's diarama. Below is an easier version - a small piece of plywood with ground cover.

Check your model for dust or specs of dirt before you shoot. Paint chips will definately show up too. Also check wheel alignment, etc.

The picture above is a nice setting - the diarama blends in nicely with the background. The shadow at the bottom of the picture can be cropped off.

With closer examination however, we can see the truck has a few dust specks on the windshield, and it also becomes apparent that the tires are oversized.
Another important tool to taking quality photos is, of course, the camera. One of the most important features of a camera for taking model pictures is "depth of field". In other words, you need to be able to focus the camera on what's in front of you. When you are at your favorite camera retailer, look at their display. Most displays will have a small bar code label by each camera. Turn the camera on, get up close, and focus on the label. If the camera won't focus, it probably won't focus on your models either. This is an easy quick test we used to select our camera. Oh - and one other thing - make sure your lense is clean!
Take a variety of pictures, not just one or two. That is the great thing about digital - you can always delete the ones you don't want. Turn the display to different angles to get a varitety of shots as well, working with the sun. Afterwards, inspect your photos on a large screen and see how you did. Don't be surprised if you notice something out of place! Looking at a picture is a great way to improve your models and picture taking ability!

These three pictures were all taken during the same photo shoot - play around with different angles and lighting effects - you'll get something you like!


The other night, we put together a TractorFab torch kit. The assembly time here took about an hour, not including paint. Lets review how it went!
Here is our tool kit and the torch set ready to go:

First Nip the tops off of the torch tanks.

File the tops of the tanks smooth.

Drill out the tanks for the valves. I used about a #77 bit. If the holes are a little large, that is ok. We'll take care of that later. At this point the tanks can be painted. The tall tank should be green. The short tank could be red or white, depending on what fuel is used.

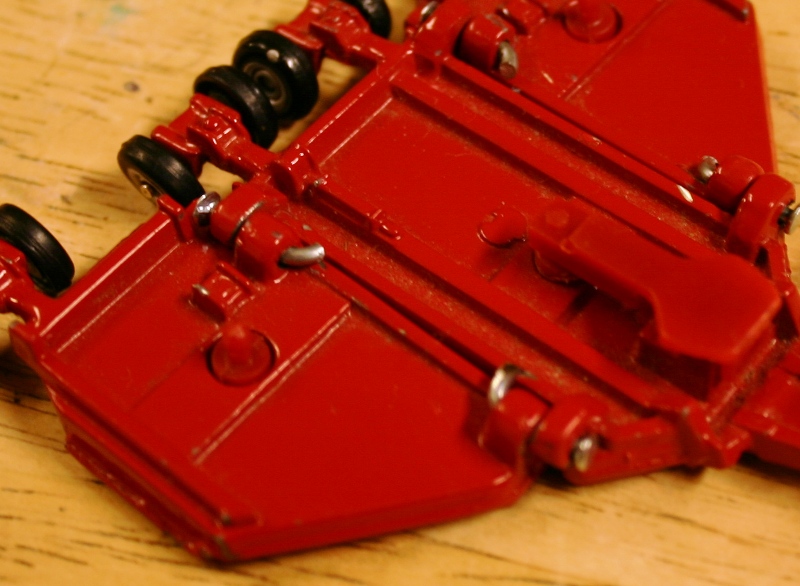
Lets make the cart next. The wheels in this kit need to be drilled out. Flip the panel over to the back side, and you will see dimples. Drill these out with same bit. Yes, this is a tooling error. We will correct it soon!

Carefully cut out the cart and wheels from the support frame.

Using needle nosed plyers, carefully fold the frame bottom, sides, and handle.


Glue the wheels together - make sure you get the rim detail out on both sides. Glue the wheels to the spindles.

Glue the tank chain onto the hook on one side. We will glue the other side after we have the tanks installed. The cart is ready for paint.

Now lets work on the torch head and hoses. This gets a little tricky! Start with the torch. insert the hosed through the two holes at the bottom of the torch head, and fold the bottom up, to crimp the wires in place.


Now the really tricky part! The small brass loops included in the kit are used to crimp the hoses together every so often. While the loop is still attached to the frame, insert both wires through the loop. Cut the loop free from the frame. Very, very carefully, crimp the loop onto the wire. Don't overcrimp, or you will cut the wire! There are extra loops included, so try one or two first at the very tail of the wire, to get the feel of the crimping action. Cut them off when you're done.

Space the crimps every so often, enough to keep the wires reasonably close together through the length of the assembly.

Now for final assembly. After all of the paint is dry, glue the valves into the tanks. Or, use JB weld if your holes are oversize.

Crimp the ends of the hoses to the tanks same as we did on the torches. The green (oxygen) hose goes to the tall tank. Glue the tanks to the cart base. Wrap the chain around the tanks, and glue in the other hook.

Your torch kit is now ready for the shop!


"Carpet Farming" can be severly hazardious to farm toys. Kids are hard on things, and repairs are often necessary. How many times have you found that your child, (or younger sibling) has broken a tractor, or it got left out "in the field" and got stepped on? Well, here are some down and dirty quick fixes to get your machines back in service!
Busted Spindles
A hay rack with three wheels, or a front wheel missing off of a tractor is no good. Often you can fix it quick with a drill, small drill bit, plyers, and a small brad or nail. If you can, simply drill a hole slightly larger than the nail diameter you are going to use. Carefully drill at the center of where the existing spindle used to be. The material should drill easily.
After drilling, insert the nail though the wheel. Insert through the drilled hole, and using plyers, bend the nail sideways so it can not come out. Cut the excess off so it won't drag on the carpet, or poke your hand later!
Alternately, you can drill part way through if the casting is deep, cut the brad to length, and stick in place with JB weld or Super Glue.
This fix doesn't just apply to wheels. The mower below was repaired the same way.

Repairs with Hot Glue
This was my son's idea - break out the hot glue gun. Do you have a tractor where the spindles are not broke, but the wheels are so wore that they just fall off? Reinstall them, and apply a dab of hot glue on the tip of the spindle. Make sure you don't get any on the wheel!


Easy Duals with hot glue - we robbed some wheels off of some collect -n- play tractors, and after applying hot glue to the back side of the tire, quickly applied them to another wheel on an existing tractor. An easy way to quickly add duals - it made the not so popular tractors in the collection quite popular!
Remember, the wheels are easily removeable, so keep away from small children!


Semi Front Axles
These semi tractors below were all out of service for the same reason - broken front wheels. Well, here is a source for replacement axles:
http://www.toytrucking.com/products/parts-and-accessories/miscellaneous.html

Save Your Parts
When you do have a tractor or implement that is beyond repair, strip off any usable parts to use later, espically the wheels. You can often find a use for them later for another project!
Just remember, toy repairs can create a small parts hazard. Use these ideas at your discretion. Toy repairs such as these are not suitable for toys for children under the age of 3.

